Wednesday, January 18, 2012

Super Easy, Super Yummy Crock Pot Chicken

Since Daniel had the day off on Monday, it felt like an extension of our weekend so I didn't do my normal cleaning/errand running/etc routine. We had this easy meal for dinner and it was sooooo yummy, I had to share.

Shredded Chicken Sandwiches
Ingredients:
  • 3-4 boneless, skinless chicken breasts (this gave us plenty of leftovers)
  • Meat tenderizer
  • Montreal Chicken Seasoning by McCormick
  • Buns (whichever kind you prefer, but we like fresh hard rolls for these sandwiches)
  • A crock pot :-)

Directions:
  1. Place the chicken breasts in a crock pot
  2. Sprinkle the meat tenderizer and montreal chicken seasoning generously over the chicken
  3. Add about a 1/2 cup of water to keep the chicken nice and moist.
  4. Cook on HIGH for about 4 hours, check that the chicken is cooked through, then turn to LOW until you're ready to eat.
  5. [Optional] Ladle out some of the excess water.
  6. Take 2 forks and shred the chicken breasts. They will fall apart so easily!
  7. Put some of the shredded chicken on your bun and you're ready to customize your sandwich!
I'm sort of a "Plain Jane" and like just the chicken on my sandwich, but the great thing about the seasoning used is that it's pretty versatile. Here are some ideas to try (all tested and enjoyed by my husband):
  • BBQ Sauce
  • Chicken-Parm Sandwich (Shredded Italian cheese mix with some spaghetti sauce on top)
  • Chicken & Cheese- melt some American (or whatever kind you prefer) on top of the chicken.
I didn't take a picture of the actual meal because we ate it before I thought about it but it's not really about presentation with this meal- it's about something super easy that people can make their own through toppings and such.

Enjoy!

Monday, January 16, 2012

Potty Training 101

***Disclaimer: I'm not a potty training expert! This is just what is working for Anna and for us as her parents. I just wanted to share some of the resources we are using and how we've adjusted them to work best for us.***

It's hard to believe that our sweet baby girl is ready to bid farewell to diapers, but we're now in the middle of potty training (today is day 3) and so far, so good! I'm hoping that she will be completely diaper free by the time Baby P arrives in mid-March. At the rate she's going, it's looking pretty promising!

Anna is just shy of 21 months so we started a little earlier than most but rather than go by age, we went by other 'cues' that she was ready:
  • Telling us when she needed changed
  • Being able to tell us when she had to go ("Mommy! Potty!!")
  • Showing interest in the 'princess potty' we got her from Amazon.com before we even started
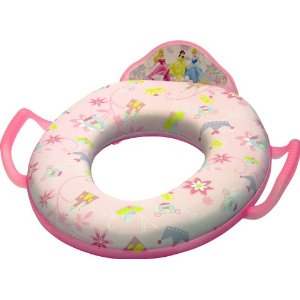
  • We love this potty seat because it fits over the regular toilet and is easy to move between the different bathrooms in our house.
We decided to wait until after the holidays to begin the actual potty training because of all the travelling we did. Also, Anna is a little older and there are fewer distractions and trips to take at home.

We picked out her "big girl pants" at Target on Thursday. They're pretty adorable, plus they're "training pants" so they are thicker than regular underwear but don't feel like diapers. Pull-ups and training pants with the outer plastic lining still feel like diapers so toddlers will continue to treat them as such so using the training pants really drives home the point of "This is NOT a diaper!" The brand we found is Gerber and they come in a variety of colors and sizes. Unfortunately, the only in-stock size was 3T- way too big for our petite baby but with a few stitches on the waistband, they stay up pretty well. Dan picked up some 2T ones today from the Base Exchange and they fit much better!

We went with the training pants instead of the naked bottom approach (which many moms swear by) but we're only putting the training pants on her rather than putting pants over top of it. This is mostly for speed when it comes to getting her on the potty. Even though it's January, we're in Mississippi so it's still pretty warm and we're wearing lots of dresses out and sticking with t-shirts when we're inside.

We are using mostly tips from this helpful article on Instructables.com as well as some from BabyCenter.com. Here are the most important things we've implemented this weekend:
  1. Dedicate a whole weekend to start potty training. This weekend worked well for us because it's a long weekend for Dan so 2 adults with their focus on one potty-training toddler.
  2. Stick to uncarpeted areas for the first day. This is mostly for ease of cleaning up accidents! We blocked off access to our living room and brought several of Anna's toys into the kitchen/eating area. I made sure to have a few surprises for her to keep her interest- I bought markers for her new easel and we spent A LOT of time drawing together as a family. We also had many tea parties, built with blocks and Anna enjoyed running around our island.
  3. Encourage dry/salty snacks to increase thirst a little. This helps the toddler become more aware of a full bladder and connect that with using the potty. Anna has always loved juice, milk and water so we didn't need to increase her thirst too much but the Cheez-Its and Goldfish definitely helped!
  4. Set a potty timer. This took a little trial and error because we always seemed to miss Anna's potty time by a couple minutes resulting in several wet pairs of panties. However, once we fine-tuned it a bit, it was helpful.
  5. Make trips to the potty exciting but not distracting. Anna is pretty patient but after several trips to the potty, she started getting bored and not wanting to sit there for several minutes. We've found that simple games (Itsy-Bitsy Spider, Pat-a-Cake, Simon Says) work well for the couple minutes before she actually goes. Bringing in toys (we tried her little toy piano) didn't work very well because she ended up just sitting there and playing- not going to the potty!
  6. Praise is the best reward. While we did reward Anna with chocolate the first day for all successful trips to the potty, we're backing away from that already. She doesn't seem to mind and is delighted when we cheer for her after she goes. Time will tell how well it works but she is very proud of her big girl pants and I think that's enough reward for her.
Both articles that we are taking our tips from say not to take the toddler out of the house for very long in the first couple days which makes a lot of sense, but we like to go to church as a family so we took a leap of faith (along with several blankets, an extra set of panties and another dress in our bag) on Sunday morning. During church (a 1 hour service), Anna used the potty twice without incident. I was worried she wouldn't go without her potty seat but she did just fine while I held her up on the big potty. We also let her nap in her big girl pants and she woke up dry both times.

Every day has been an improvement and I'm hopeful that Anna will continue to grow in confidence as she gets to wear her big girl pants all the time. The Instructables article says to continue to use diapers at bedtime until they are accident free for 2 weeks. We're going to play it by ear. Anna wakes up dry pretty consistently but I think we'll see how the next few days go.

Monday, January 9, 2012

Monday=Funday!

Today started out well and has continued to be a really nice time with my sweet Anna. Daniel has been MIA all day but since he's in a course right now that is taught in a SCIF (Secure Compartmented Information Facility), I'm not surprised by the fact he didn't come home for lunch.


We started our morning with a trip to the Dunkin Donuts (a recent addition to Pass Rd that caused quite a buzz among the Keesler spouses) with a new friend, Kelley, and her 2 boys. After Anna enjoyed her 'spinkoll' donut, the two of us split a bottle of milk and delicious cinnamon raisin bagel while talking with Kelley. Her boys (4yo and 7 months) were very well behaved and thankfully, so was Anna. Kelley and I both have sewing projects we're working on, so we hit up Hancock Fabrics for a little shopping which was a miss for Kelley (no boy owl patterns in cotton- only fleece!) and was a so-so trip for me. I found a few fat quarters with which to start Anna's big girl bed quilt to coordinate with the nursery colors. (More posts on that to come!)


Once the inevitable pre-naptime crankiness hit, we knew it was time to leave. Anna and I swung by Winn-Dixie for a few things we couldn't find at the commissary yesterday and came home shortly afterwards.


After a quiet lunchtime with Anna napping and Daniel not home, I was able to get some laundry started before my little girl woke up. And that's when the fun in the kitchen started!


After seeing a facebook post from a friend about food-based, homemade fingerpaints, I was curious. Thanks to this Pinterest post, I found all the needed ingredients in my pantry and got to work. Anna helped by pouring in ingredients into the pot. It didn't take long at all to make, but it did need to cool before little fingers got to painting.


While it was cooling, I decided to make some homemade taco seasoning by following this recipe (another Pinterest find). I'm making Daniel tacos tomorrow, so we'll see how it turns out!


Once the paint was cooled, I put it into 4 containers and added food coloring (red, blue, green, and yellow). I stripped Anna down to her diaper and we went to town fingerpainting out on our back porch. Here's a look at my budding artist!


Once Anna got a bath after this fun (but messy) craft, we headed out to the park to swing.


It's been quite an enjoyable day with my sweet girl. I'm soaking up these Anna & Mommy moments before our little girl is a big sister. I know that the fun and the love will only multiply with our new baby who will arrive in a few months, but I want to make sure we do lots of fun things together in the meantime!

Saturday, January 7, 2012

Simple Italian Dinner- Healthy Chicken Parm

I've started planning out our meals weekly (at least more regularly) thanks to a great menu planner/shopping list (second PDF shown) I found via Pinterest. Along with being great way to figure out shopping, it also gives me more flexibility to switch meals around as needed. For instance, I was feeling a bit drained and didn't feel like cooking a whole big dinner on Thursday so we had leftovers instead of my planned chicken parm meal. This was no big deal, but I had bought fresh Italian bread to go with the meal and I feared it would get stale by the time we had the chicken parmesan (tonight, Saturday). In a stroke of genius, I decided to use it to make homemade garlic bread. I found this recipe on AllRecipes.com and I modified it a little bit. Below is my modified recipe, along with how I made my chicken parmesan (healthy version) and Italian roasted potatoes. They're all very simple and very tasty (at least in my opinion!).

Garlic Bread
Ingredients:
  • 1 load of Italian bread
  • 1/2 cup butter (softened)
  • 1 1/2 to 2 bulbs of garlic (NOT cloves- whole bulbs!)
  • 1 tsp of Italian seasoning
  • 2 tsp olive oil
  • 1 to 2 Tbsp of shredded cheese (I used Sargento 6 Cheese Italian mix)
Preheat oven to 350. Slice the tops off the garlic bulbs. Place them on a cookie sheet or on a mini sheet (made of a piece of heavy duty aluminum foil) and drizzle with the olive oil. Roast for 30 minutes or until garlic is soft.

Slice the bread in half, horizontally and set on a cookie sheet, sliced sides up.

Squeeze garlic out of its skin and combine with butter. I found it easiest to use my little food processor for this because the garlic was soft but not very willing to be broken out of its clove form.

Spread the garlic butter paste over the 2 halves of bread, sprinkle the Italian seasoning and shredded cheese over top.

Set your oven to "Broil" and broil the bread until it is nice and toasted! Allow to cool a bit and slice it up!


Italian Roasted Potatoes
Ingredients:
  • 4-5 medium to large potatoes
  • Olive Oil
  • Garlic salt
  • Italian seasoning
Preheat your oven to 500. Dice your potatoes into roughly 1" square pieces. Cover a cookie sheet with aluminum foil (this will make clean up A LOT easier). Spray the foil with Pam or another non-stick spray.

Place the potatoes in a single layer over the sheet and drizzle with olive oil. Generously sprinkle garlic salt and Italian seasoning over the potatoes. Bake for 25 minutes or until potatoes are golden brown.

Before baking

After baking- golden brown & yummy!
 For me, the potatoes are the first thing to be finished so here's a trick to keep them warm until dinner time.

Take a ceramic bowl (I use my Corning ware) and run very hot water over the inside until it feels warm even after you take it away from the water. Dry it out and transfer the potatoes. To keep the heat in without having the potatoes get mushy, place a paper towel to absorb the steam over the potatoes before covering.


Healthy Chicken Parmesan

Ingredients:
  • 1 1/2 to 2 pounds of boneless, skinless chicken breasts
  • Traditional Tomato Sauce (I use Prego Traditional- close to heresy in my Italian family, but I use it infrequently enough that I can't justify the time to make a huge vat of spaghetti sauce like my mom.)
  • Shredded Italian Cheese (Sargento 6 Cheese Italian mix is my preferred cheese because the variety gives it a lot of flavor)
I find that it speeds up the cooking process if the chicken breasts are tenderized and flattened a bit. To contain the chicken juices I place the breasts in a freezer bag, seal it, then tenderize it.
Once that's done, I trim the excess fat and cut the breasts in half to make smaller portion sizes.

For super easy grilling, I use my George Foreman grill, but a grill pan over the stove will work just as nicely. Grill the chicken until thoroughly cooked through.

Transfer the grilled chicken breasts over to a cookie sheet (I used the same foil-covered sheet that I used for the potatoes to save on clean up time). Spoon sauce over each piece and generously sprinkle the cheese over top of it.

Broil the chicken until the cheese is melted and golden brown.


Enjoy your meal with a nice glass of wine and toast to a dinner well made!

Back for 2012... and hopefully more regular posts!

So it's been quite awhile since I posted, but here's a quick recap on where we are:
  • We moved to Keesler AFB in Biloxi, MS in August for Daniel's new training (Undergraduate Cber Training).
  • We LOVE our new home on base and have made lots of good friends over the past few months.
  • We're expecting a bundle of joy in mid-March and couldn't be happier about it!
  • We hosted our first Thanksgiving in our home when Daniel's parents & brother came in for the holiday.
  • We spent Christmas and New Year's in Pittsburgh and are now home and back to 'normal.'
Over the past month or so, I've discovered a love for Pinterest which is an online 'pin' board to help keep all the cool recipes, ideas, crafts, etc I find online organized and in one place! I'll be sharing some of those ideas here (and how successful (or not) I've found them to be) and some that I've come up with on my own. Hope you'll join me!